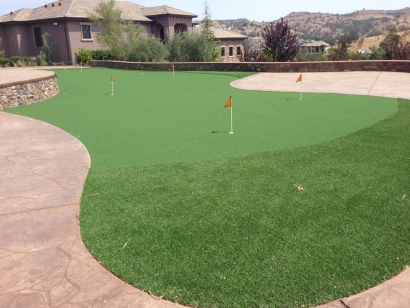
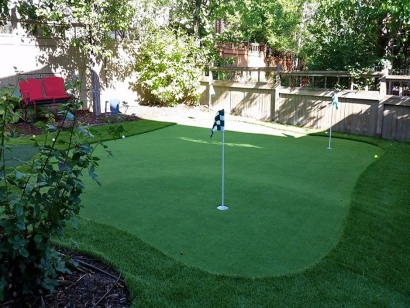
It always feels good to roll on your own. But it's nearly impossible to grow a putting green in your back yard. Which is why most homeowners seeking to pack more golf into their lives, go with synthetic putting greens. The occasional pass with a leaf blower is all you need to keep your private putting green perfect.
It always feels good to roll on your own. But it's nearly impossible to grow a putting green in your back yard. Which is why most homeowners seeking to pack more golf into their lives, go with synthetic putting greens. It doesn't add a chore, other than an occasional pass with a leaf blower.
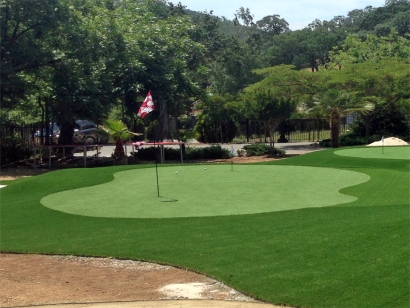
If you choose to go "golf" any time at the comfort of your backyard, you most likely hire an installation company. Or, you can add a "do-it-yourself" project to your list of spring activities. If you go with an installer, make sure they understand golf. Installing putting green is similar but not the same as a landscape installation.
1. The main concern is the smoothness of the base. Each step of installing the foundation, from the crushed rock to the class II road base or decomposed granite requires 90% compaction. Use the level to create a slight grade of the entire area for ideal drainage, but also make sure the 3-foot radius around every golf cup is flat and smooth. You want your golf ball roll right into the hole, not stopping or curving away from it.
2. Installing putting green cups can make or break your installation. The cups must be set 1/4 inch below the surface, not too low or too high. Any base other than concrete will shift over time causing cups to move. Also, cups must be allowed to be accessed at any time without raising the entire surface.
Clean the area of grass, sprinklers, and any ground vegetation.
Remove 3-4 inches of sod.
Make sure you have a slight grade for drainage.
Tips: It's important to remove enough ground for the depth of base taking into consideration the height of putting greens. If the ground is too wet, give it time to dry out.
Once the ground is fairly solid, distribute 2 - 2 1/2 inches of drain crushed rock. Use the vibratory plate compactor.
On 90% compacted rock, distribute 1 - 1 1/2 inches of either class II road base or decomposed granite. Compact it as well.
Create a slight grade for optimal water runoff. Use the carpenter's level, brick layer's level, string level or wooden stakes to determine the slop of your area.
Tips: Compaction is the key to the ultimate success of your putting green installation.
Make sure you plan for enough base. If you live in the freeze-thaw climate, it requires a thicker base.
Compaction is vital. Rent a plate compactor from Lowes or HomeDepot for best results.
Be aware of adjusting the compaction force on a compactor. Small forward plate compactors may only handle 2" lift, while reversible compactors can handle 6" or more lifts. As a rule of thumb, make your lift height in the ratio on 1" for every 1,000 lbs. of compaction force.
Moisture content: Base materials need to have sufficient moisture to reach maximum compaction. Water lubricates particles and helps them slide into place when the vibratory plate passes. Use a garden hose to dampen it, but be careful not to saturate it. Repeat these process for as many times as required to achieve at least 90% of compaction.
Once your base is compacted, and the area is contoured, locate the placements of your golf cups. Allow a distance of at least 3 feet around every cup.
You can place putting green cups in a base, but to ensure the trustworthy installation, using concrete to secure the area is recommended, especially if you live in the freeze-thaw climate. The base is shifting due to rain and foot traffic; and when the cup is not stabilized, it will move causing the flags tilt.
The hole size depends on your cups size (4-1/4" or 6".) Add 2 inches around the cup diameter. This will allow for concrete to wrap around it. The hole should be dug 1" deeper than the cup.
Tips:
When you dig a hole, be careful of not mixing it with the base materials. Use a plastic bag to collect the excavated soil or extra sub-base.
If your soil doesn't allow sufficient drainage, dig a hole 2-4 inches deeper than the height of a cup and add gravel. The top of the cup should be 1/4" below the surface of a green.
Prepare your cups. Spray cups with WD40 Silicon Lubricant to allow its exterior slide up and down.
Insert golf cups into holes.
Add fast drying concrete mix power 3' around the cup's perimeter. Pack down the mix.
Add water to the concrete mix until it's saturated.
If you decide to use concrete only around the cup, compact the sub base around each cup with a compactor to level the surface.
The plate compactor causes small ridges on the base. Remove them with a bottom of a shovel, rake, or hand tamp to flatten the area.
You can add a commercial grade medium sand top fill any cracks and give a super smooth surface that will help turf fit like a glove. Use a medium bristle push broom to lightly sweep the sand and loose gravel off your base.
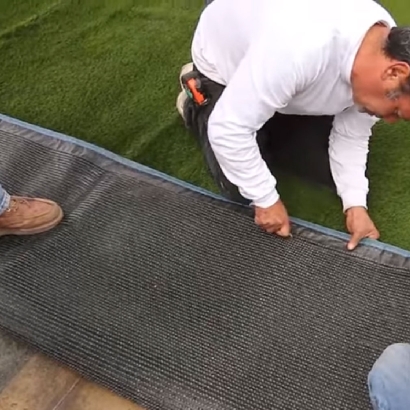
Place putting green on the base. Be careful not to disturb the base.
Tips:
1. Make sure the grain of each roll is running the same direction.
2. Remove all creases in the turf to ensure smooth ball rolling.
Cut off the excess turf on the backside around the perimeter (3 stitches from sides.) Cut as close to the side row of stitching as possible, but don't cut into it. Be careful and take your time.
Tip: It's easier to cut from the back as you can see the tufting.
In places where two rolls will seam, cut the excess turf only on one side. Keep the second piece that will go under the first untouched. This will help a tight fit and a perfect seam when you join them together.
Fasten one end of putting green with 40D or 60D Bright Common nails distributing them 3-4 inches around the perimeter.
Place bags of infill every 5 feet on sides of the turf. This will prevent turf from moving during the seaming process.
Seam turf using 11 gauge 6''x1''x6'' staples spaced 4 inches apart, or use seaming tape and glue. Use a carpet stretcher to avoid wrinkling.
Tips: Replace your utility knife blade after cutting every ten feet in length to avoid ripping through the turf.
Cut the turf over the prepared holes using a utility knife or a circle cutter. Be careful not to cut too much leaving a gap between your greens and a cup.
After you cup a turf for your cup, adjust a sleeve, so the cup sits at the height you desire but not above the tip of the fibers.
Cut the outer edges with a carpet knife around the contour. You can use sidewalk chalk and scribe your design onto the top of the turf.
Stretch turf and fasten with nails carefully as you are moving toward the opposite end.
As rule of the thumb, place nails 3-4 inches along the perimeter and 12-24 inches throughout the center.
Use the drop spreader to apply infill.
Applying the proper amount of infill will help to weigh the turf down, help with the hold-ability of chip shots, and ensure the longevity of your putting green.
Hand or power broom the area.
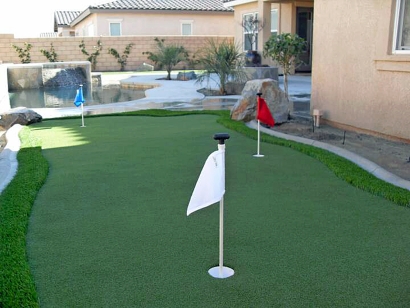
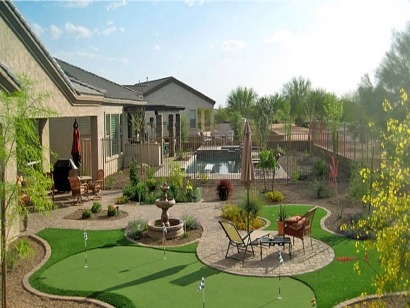
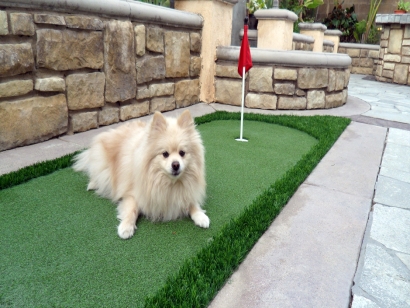
Artificial grass is an excellent option for golfers. It works for residential golf areas, playground surfaces, dog runs, athletic fields, lawns, and indoor putting green. Environmentally friendly, recyclable, aesthetic and green year round, they eliminate a need weeding, mowing, fertilizing, pesticides, or watering.
Global Syn-Turf offers "look and feel real" synthetic grass with a 15-year warranty and up to 25 years life expectancy that will increase your property value, help you conserve water, reduce lawn upkeep. For professional golfers, it means year-long golf game, unlimited outdoor or indoor golf training, worry-free golf practice, and greener, safe environment for kids and family.
Feel free to contact us if you have any questions with your putting greens installation, share ideas, or estimate your project in details.